前言,老實說呢,我很懶得寫這篇,因為之前的電腦 win 10 跑 wsl or cmder 基本上都很順,
windows 對照 vim 快速操作技巧 最近又回來用 windows 覺得賭爛 , 筆記一下操作 , 應該還要寫個 emacs 的方式才對畢竟 terminal 常常用 , 有空再搞ctrl + z 復原 uctrl + y 復原前的狀態 ctrl + rctrl + g 移動到行號 :5ctrl + ← 往左移動一整個單字 bctrl + → 往右移動一整個單字 wctrl + shift + ← 往左選取一整個單字 vbctrl + shift + → 往右選取一整個單字 vehome 移動到行頭 ^end 移動到行尾 $shift + home 目前位置選到行頭 v^shift + end 目前位置選到行尾 v$ctrl + backspace 刪除一個單字 , 中文的話就是刪除到空白為止 dawctrl + home 移動到文件最頂端 ggctrl + end 移動到文件最尾端 Gctrl + ↑ 往上捲 ctrl + ectrl + ↓ 往下捲 ctrl + yctrl + shift + ↑ 將此行往上移動 :m-2ctrl + shift + ↓ 將此行往下移動 :m+1
windows 對照 terminal 快速操作技巧 end 往前刪除一個字 ctrl + hdelete 刪除目前游標的字 ctrl + d
← 往左移動一個字 ctrl + b→ 往右移動一個字 ctrl + f
ctrl + ← 往左移動一個單字 alt + bctrl + → 往右移動一個單字 alt + f
ctrl + shift + ← + delete or ctrl + backspace 往左刪除一個單字 ctrl + wctrl + shift + → + delete or ctrl + → + backspace 往右刪除一個單字 alt + d
shift + end + delete 刪除目前游標之後的所有字 ctrl + khome + shift + end + delete 刪除整行 ctrl + a ctrl + k
home 移動到開頭 ctrl + aend 移動到結尾 ctrl + e
ctrl + l 清除畫面
安裝 oh-my-bash 算是無腦安裝 oh-my-bash
1
2
cd $HOME bash -c "$(curl -fsSL https://raw.githubusercontent.com/ohmybash/oh-my-bash/master/tools/install.sh)"
預設會幫你蓋 .bashrc 我想要啟動時也直接啟動,所以把 .bashrc 裡面的設定直接複製到 .bash_profile , 若沒有這兩個檔案可以自己手動建立
Git bash for windows 設定 vim 在 git bash for windows 底下輸入以下命令
1
2
curl -fLo ~/.vim/autoload/plug.vim --create-dirs \ https://raw.githubusercontent.com/junegunn/vim-plug/master/plug.vim
搞定後會在 ~/.vim 目錄底下多出 autoload , plugged 資料夾跟 neovim 有點不太一樣
要 config vim 的設定檔則在以下路徑C:\Program Files\Git\etc\vimrc
安裝 :PlugInstall
1
2
3
~\.vim\plugged\vim-airline\autoload\airline\extensions\tabline\buffers.vim let s:number_map = { '0' : 0 , '1' : 1 , '2' : 2 , '3' : 3 , 4 : '4' , 5 : '5' , 6 : '6' , 7 : '7' , 8 : '8' , 9 : '9' }
解決 git bash for windows python 輸出有問題 nodejs 應該也會有這種類似的狀況,解法就是要用 winpty 把 windows 的 exe 指令給包一層 參考不錯的說明
1
2
3
4
5
6
cd ~ vim ~/.bashrc #加入內容 alias python='winpty python' alias pip='winpty pip' source ~/.bashrc
check vim support python 這個 python support 在 git for windows 的 vim 底下一定是沒 support 的,又雷得不要不要的
1
2
3
4
vim --version | grep "+python" :echo has('python3') :echo has('python') return 1 即可
解決 vim 編輯檔案時忘了加上 sudo 造成 readonly 的問題 這問題困擾滿久的 , 有時候編輯一堆內容才發現忘了加 sudo , 今天無意中看到老外說明
Narrow to region 最近無意中發現 emacs 大師說過的 Narrow to region vim 版 , 就抓來用看看 , 發現還滿有用的
安裝 安裝老樣子在 init.vim or vimrc 加上這行
接著
複習 split window 要用 narrow to region 需要些 split window 基本知識才好用 , 我平時不太常用 split window 功能所以複習下ctrl + w + wctrl + w + h/j/k/l 注意是小寫ctrl + w + H/J/K/L 注意是大寫
操作 裝好以後先把想要變成 Narrow to region 的部分選起來 , 也就是進入到 visual mode , 然後輸入 :NRctrl + w + H
詳細操作如下 , 可以看他 github
:NW - Open the current visual window in a new narrowed window
:WR - (In the narrowed window) write the changes back to the original buffer.
:NRV - Open the narrowed window for the region that was last visually selected.
:NUD - (In a unified diff) open the selected diff in 2 Narrowed windows
:NRP - Mark a region for a Multi narrowed window
:NRM - Create a new Multi narrowed window (after :NRP) - experimental!
大概可以這樣用 , 假設有個片段長這樣 , 想要修改 id 為 header , footer 的內容
1
2
3
4
5
6
7
8
9
10
11
12
13
14
15
16
17
18
19
20
21
22
23
<div id="header" class="container"> <div class="row"> <div class="col-md-4">col</div> <div class="col-md-4">col</div> <div class="col-md-4">col</div> </div> </div> <div id="mid" class="container"> <div class="row"> <div class="col-md-6">col</div> <div class="col-md-6">col</div> </div> </div> <div id="footer" class="container"> <div class="row"> <div class="col-md-3">col</div> <div class="col-md-3">col</div> <div class="col-md-3">col</div> <div class="col-md-3">col</div> </div> </div>
他會給你 header 及 footer 片端像是這樣
1
2
3
4
5
6
7
8
9
10
11
12
13
14
15
16
17
18
19
20
<!-- Start NrrwRgn1 buffer: .\bootstrap4.html --> <div id="header" class="container"> <div class="row"> <div class="col-md-4">col</div> <div class="col-md-4">col</div> <div class="col-md-4">col</div> </div> </div> <!-- End NrrwRgn1 buffer: .\bootstrap4.html --> <!-- Start NrrwRgn2 buffer: .\bootstrap4.html --> <div id="footer" class="container"> <div class="row"> <div class="col-md-3">col</div> <div class="col-md-3">col</div> <div class="col-md-3">col</div> <div class="col-md-3">col</div> </div> </div> <!-- End NrrwRgn2 buffer: .\bootstrap4.html -->
這時候就可以下 replace 命令把 col 內容換成 xxxx 之類的操作 , 然後不會動到中間 id 為 mid 的內容:%s/>col</>xxxx<
:NRS - Enable Syncing the buffer content back (default on)
:NRN - Disable Syncing the buffer content back
:NRL - Reselect the last selected region and open it again in a narrowed window
Tmux 安裝 萬事起頭難,參考還不錯的大陸人設定 教學
1
2
3
4
5
6
git clone https://github.com/xnng/bash.git cd bash explorer . 分別複製 tmux/bin 底下所有檔案到 C:\Program Files\Git\usr\bin tmux/share 底下所有檔案到 C:\Program Files\Git\usr\share
應該也可以直接下 command 不過需要 windows admin 權限,可以安裝 gsudo
在 $HOME 底下新增以下 .tmux.conf 檔案參考自 參考自印度仔
1
2
set -g default-terminal "xterm-256color" set -ga terminal-overrides ",*256col*:Tc"
vimrc
1
2
3
if (has("termguicolors")) set termguicolors endif
Bash for Windows tmux vim 中文亂碼設定及真色設定 在 git bash for windows 開啟 options => text => Locale zh_TW => Character set UTF-8
萬一遇到簡體中文造成亂碼可在 vimrc 加入以下內容
1
2
3
set fileencodings=utf-8,gb2312,gb18030,gbk,ucs-bom,cp936,latin1 set enc=utf8 set fencs=utf8,gbk,gb2312,gb18030
最終 vim 設定檔 注意如果是用 git bash for windows 這些要放在預設的那段下面,另外 utf8 要註解掉
1
2
3
4
5
6
7
8
9
10
11
12
13
14
15
16
17
18
19
20
21
22
23
24
25
26
27
28
29
30
31
32
33
34
35
36
37
38
39
40
41
42
43
44
45
46
47
48
49
50
51
52
53
54
55
56
57
58
59
60
61
62
63
64
65
66
67
68
69
70
71
72
73
74
75
76
77
78
79
80
81
82
83
84
85
86
87
88
89
90
91
92
93
94
95
96
97
98
99
100
101
102
103
104
105
106
107
108
109
110
111
112
113
114
115
116
117
118
119
120
121
" 注意如果是用 git bash for windows 這些要放在預設的那段下面 call plug#begin('~/.vim/plugged') " Plug 'joshdick/onedark.vim' " Plug 'iCyMind/NeoSolarized' Plug 'vim-airline/vim-airline' Plug 'vim-airline/vim-airline-themes' " 佈景主題 Plug 'ayu-theme/ayu-vim' " 檔案樹 Plug 'scrooloose/nerdtree' " 會亂碼 " Plug 'ryanoasis/vim-devicons' " emmet Plug 'mattn/emmet-vim' " 註解外掛 Plug 'tpope/vim-commentary' " 快速替換開頭結尾 Plug 'tpope/vim-surround' " 多重游標 Plug 'mg979/vim-visual-multi', {'branch': 'master'} " 縮排線 " 無效? " Plug 'Yggdroot/indentLine' " 縮排線 Plug 'nathanaelkane/vim-indent-guides' " Error " live server " Plug 'turbio/bracey.vim' " css 顏色 Plug 'ap/vim-css-color' " 自動括號 Plug 'jiangmiao/auto-pairs' call plug#end() " 設定編碼 set encoding=UTF-8 set fileformat=unix " 行號 set nu set relativenumber " 剪貼設定 set clipboard=unnamed " 設定cursor顏色 " set cursorcolumn " set cursorline " tab寬度 syntax enable set smartindent set tabstop=4 set shiftwidth=4 " set expandtab " 設定字體 " set guifont=Fira\ Code:h12 " ariline " 開啟tab樣式 let g:airline#extensions#tabline#enabled = 1 " 設定NERDTree nnoremap <silent> <C-k><C-B> :NERDTreeToggle<CR> autocmd bufenter * if (winnr("$") == 1 && exists("b:NERDTree") && b:NERDTree.isTabTree()) | q | endif " 設定 emmet " let g:user_emmet_install_global = 0 autocmd FileType html,css EmmetInstall imap <expr> <tab> emmet#expandAbbrIntelligent("\<tab>") " 設定縮排顏色 " let g:indentLine_setColors = 0 " let g:indentLine_color_term = 239 " let g:indentLine_char_list = ['|', '¦', '┆', '┊'] " 設定縮排第二種 let g:indent_guides_enable_on_vim_startup = 1 hi IndentGuidesOdd ctermbg=white hi IndentGuidesEven ctermbg=lightgrey " 設定自動括號 let g:AutoPairsFlyMode = 1 " 設定佈景主題 set termguicolors " enable true colors support let ayucolor="light" " for light version of theme " let ayucolor="mirage" " for mirage version of theme " let ayucolor="dark" " for dark version of theme colorscheme ayu" " " tmux true color if (has("termguicolors")) set termguicolors endif "esc inoremap ,, <Esc> nnoremap ,, <Esc> map ,so :so ~/.vimrc <CR>
最終 Tmux 設定 1 2 3 4 5 6 7 8 9 10 11 12 13 14 15 16 17 18 19 20 21 22 23 24 25 26 27 28 29 30 31 32 33 34 35 36 37 38 39 40 41 42 43 44 45 46 47 48 49 50 51 52 53 54 55 56 57 58 59 60 61 62 63 64 65 66 67 68 69 70 71 ### rebind hotkey # prefix setting (screen-like) set -g prefix C-a unbind C-b bind C-a send-prefix # reload config without killing server bind R source-file ~/.tmux.conf \; display-message "Config reloaded..." # "|" splits the current window vertically, and "-" splits it horizontally unbind % bind | split-window -h bind - split-window -v # Pane navigation (vim-like) bind h select-pane -L bind j select-pane -D bind k select-pane -U bind l select-pane -R # Pane resizing bind -r Left resize-pane -L 4 bind -r Down resize-pane -D 4 bind -r Up resize-pane -U 4 bind -r Right resize-pane -R 4 ### other optimization # set the shell you like (zsh, "which zsh" to find the path) # set -g default-command /bin/zsh # set -g default-shell /bin/zsh # use UTF8 #set -g utf8 #set-window-option -g utf8 on # display things in 256 colors set -g default-terminal "screen-256color" #set -g default-terminal "xterm-256color" #set -g default-terminal "xterm" #啟動真色 set -g default-terminal "xterm-256color" set -ga terminal-overrides ",*256col*:Tc" # mouse is great! set-option -g mouse on # history size set -g history-limit 10000 # fix delay set -g escape-time 0 # 0 is too far set -g base-index 1 setw -g pane-base-index 1 # stop auto renaming setw -g automatic-rename off set-option -g allow-rename off # renumber windows sequentially after closing set -g renumber-windows on # window notifications; display activity on other window setw -g monitor-activity on set -g visual-activity on
後記的靈異事件 這個事件是由某天懶得貼上格式發生的直接把 set paste 寫在 .vimrc 裡面發生悲劇了 ,INSERT PASET
windows 底下使用 neovim chocolatey 下載 nvim
將 vimrc 複製到以下路徑 , 並修改為 init.vimC:\Users\YourName\AppData\Local\nvim
下載 vim-plug
1 2 iwr -useb https://raw.githubusercontent.com/junegunn/vim-plug /master/plug.vim |` ni "$ (@($env:XDG_DATA_HOME , $env:LOCALAPPDATA )[$null -eq $env:XDG_DATA_HOME ])/nvim-data/site/autoload/plug.vim" -Force
開啟 nvim 安裝 plugin
無腦的 neovim 管理版本工具 有時候 neovim 更新還滿麻煩的 , 無意中找到 bob , 乾脆就直接用它來管理版本吧
預設路徑在此 C:\Users\YourName\AppData\Local\bob\v0.8.1\nvim-win64\bin , 記得加入到環境變數就搞定了
ubuntu 設定 vim 下載外掛管理員
1 curl -fLo ~/.vim/autoload/plug.vim --create-dirs https://raw.githubusercontent.com/junegunn/vim-plug/master/plug.vim
建立 .vimrc
登入 vim 安裝外掛
或是直接在 terminal vim +PlugInstall
在 root 使用者安裝
1 2 3 4 5 6 sudo -i cd /root curl -fLo ~/.vim/autoload/plug.vim --create-dirs https://raw.githubusercontent.com/junegunn/vim-plug/master/plug.vim touch .vimrc vim :PlugInstall
選取與移動的實用技巧 啪啪神器 matchit vim 內建的 matchit 參考這篇 vim-matchup ~/AppData/Local/nvim/init.vim
1 Plug 'andymass/vim-matchup'
打開 vim 輸入
他好像是會認附檔名 , 所以附檔名要正確才會生效 , 感覺比較有用的增強功能應該是 z% , 經典功能 %%% 一樣可以在頭尾快速移動
往外延伸選取 vim-expand-region 可以參考這個
老樣子無腦安裝在 vimrc 加上以下這段 , 這邊用 neovim ~/AppData/Local/nvim/init.vim
1 Plug 'terryma/vim-expand-region'
打開 vim 輸入
接著 map 成 emacs 大師教的即可 , 他官方好像還有教可以自定義 expand 的行為 , 這裡就懶得設定了
1 2 map ,xx <Plug>(expand_region_expand) map ,zz <Plug>(expand_region_shrink)
縮排選取好幫手 vim-indent-object 可以參考這個
老樣子無腦安裝在 vimrc 加上以下這段 , 這邊用 neovim ~/AppData/Local/nvim/init.vim
1 Plug 'michaeljsmith/vim-indent-object'
打開 vim 輸入
接下來搭配這串 code 進行說明
1 2 3 4 5 6 7 8 9 admin: address: socket_address: { address: 127.0.0.1, port_value: 9901 } static_resources: listeners: - name: listener_0 address: socket_address: { address: 127.0.0.1, port_value: 10000 }
假設游標在 address 上 , 用 vii 可以選到以下兩行
1 2 address: socket_address: { address: 127.0.0.1, port_value: 9901 }
假設游標在 address 上 , 用 vai 可以選到以下三行 , 另外有個細節就是要搭配 o 使用可以移動到選取的頭尾- 這個符號會造成誤判 , 所以選的時候要慎用 , python 也是相同原理 , 總之就是個半殘的選法
1 2 3 admin: address: socket_address: { address: 127.0.0.1, port_value: 9901 }
使用 COC 補全 k8s yaml 因為在搞 docker + k8s , 需要編輯 yaml 檔 , 直接在 linux 上面沒有 auto complete 實在太噁心了這篇老外文章 , 之前好像沒用過 coc? 忘了?教學影片 真佛心
1 2 3 4 5 " Use release branch (Recommend) Plug 'neoclide/coc.nvim', {'branch': 'release'} " Or build from source code by use yarn: https://yarnpkg.com Plug 'neoclide/coc.nvim', {'do': 'yarn install --frozen-lockfile'}
接著輸入以下命令安裝
萬一 coc 炸 error 檢查看看自己有無安裝 python , 另外好像還要裝 nodejs 不過我機器上已經有了參考自老外解法
1 python3 -m pip install --user --upgrade pynvim
如果是用 ubuntu 需要先安裝 nodejs , 注意 nodejs 版本要 12.12 以上 , 小心不要直接用 apt-get install 有可能安裝到舊版 , 在 ubuntu 20.04 上 default 好像是 node 10?移除
1 2 curl -sL https://deb.nodesource.com/setup_14.x | sudo bash - sudo apt-get install -y nodejs
安裝 coc-yaml
萬一 coc 炸出這個 error 可能是 nodejs or python 沒安裝或是版本錯誤 , 請確認版本是否正確
1 client coc abnormal exit with: -1
接著照打開 CocConfig 編輯
使用 vim 的話 coc 路徑會在如下位置 ~/.vim/coc-settings.json~/AppData/Local/nvim/coc-settings.jsonctrl + n ctrl + p 上下移動補全的 menu 不過好像 vscode 的更好用一點
1 2 3 4 5 6 7 8 9 10 11 12 13 14 { "languageserver": { "golang": { "command": "gopls", "rootPatterns": ["go.mod"], "filetypes": ["go"] } }, "yaml.schemas": { "kubernetes": "/*.yaml" } }
安裝 zsh oh-my-zsh 及 powerline 參考 oh-my-zsh 官網
1 2 3 sudo apt-get install zsh sh -c "$(curl -fsSL https://raw.github.com/ohmyzsh/ohmyzsh/master/tools/install.sh)" sudo apt install powerline fonts-powerline
在 ubuntu 內挑選佈景
1 2 3 4 5 6 7 8 9 10 vim ~/.zshrc #比較不花俏的預設佈景 #ZSH_THEME="darkblood" #dracula #ZSH_THEME="dracula" #重新載入 source ~/.zshrc
因為 git for windows 上面預設的布景 dracula 用習慣了 , 所以就安裝看看
1 2 3 4 git clone https://github.com/dracula/zsh.git cd zsh cp dracula.zsh-theme ~/.oh-my-zsh/themes/. cp -r lib ~/.oh-my-zsh/themes/.
搞定布景後安裝 oh my zsh 的 plugin , 這裡參考大神 Victor 的設定zsh-autosuggestions zsh-completions zsh-syntax-highlighting
1 2 3 4 cd ~/.oh-my-zsh/custom/plugins git clone https://github.com/zsh-users/zsh-autosuggestions.git git clone https://github.com/zsh-users/zsh-completions.git git clone https://github.com/zsh-users/zsh-syntax-highlighting.git
接著找到 plugins 改成這樣
1 2 3 4 5 6 7 8 9 10 11 vim ~/.zshrc #plugins=( # git # zsh-autosuggestions # zsh-completions # zsh-syntax-highlighting # colored-man-pages #) source ~/.zshrc
為你的 cat 加上色彩 因為常常會用 cat 看些東東但是沒有語法高量可以考慮安裝 bat 讓操作舒服點
1 2 3 4 sudo apt install bat vim ~/.zshrc #加上 alias alias bat=batcat
裝 B 移動目錄神器 Ranger 筆記 安裝 ranger , 也可以參考這老外教學 , 也可以看下強國人影片
開啟 ranger 讓他自動建立資料夾
複製 ranger 的預設設定檔 template
1 ranger --copy-config=all
設定 ascii preview image 首先設定 scope.sh 找到這段把 img2txt 原本的註解開起來
1 2 3 4 5 6 7 8 vim ~/.config/ranger/scope.sh ## Image image/*) ## Preview as text conversion img2txt --gamma=0.6 --width="${PV_WIDTH}" -- "${FILE_PATH}" && exit 4 exiftool "${FILE_PATH}" && exit 5 exit 1;;
接著設定 ~/.config/ranger/rc.conf
1 2 3 set preview_images false set use_preview_script true set preview_script ~/.config/ranger/scope.sh
設定 x11 preview image 注意只有在 ubuntu 有 gui 的機器有用 , 用 ssh 應該回 ascii 模式 , 先安裝 x11 相關工具及 ueberzug
1 2 3 4 5 6 7 sudo apt update sudo apt upgrade sudo apt-get install -y libx11-dev sudo apt-get install -y xorg openbox sudo apt-get install -y x11proto-xext-dev sudo apt-get install -y libxext-dev pip3 install ueberzug
設定 ~/.config/ranger/rc.conf
1 2 set preview_images true set preview_images_method ueberzug
萬一炸 WARNING 設定以下即可
1 2 #echo 'export PATH=~/.local/bin:$PATH' >> ~/.bashrc echo 'export PATH=~/.local/bin:$PATH' >> ~/.zshrc
最後預覽一下正妹
1 crul https://instagram.frmq3-1.fna.fbcdn.net/v/t51.2885-15/sh0.08/e35/s640x640/169486234_744729692910070_7136376512717038837_n.jpg?tp=1&_nc_ht=instagram.frmq3-1.fna.fbcdn.net&_nc_cat=110&_nc_ohc=jehk2TKowmEAX8DDWGK&edm=AABBvjUBAAAA&ccb=7-4&oh=95e49414292080950b57f70c1e6d1c09&oe=60C92944&_nc_sid=83d603 --output nono.png
在 ubuntu 上撰寫 .net core 5 今天在 ubuntu 20.04 linux 上安裝 .net core 5 莫名其妙炸了個奇怪的 error
1 E: The repository 'https://packages.microsoft.com/ubuntu/18.04/prod focal Release' does not have a Release file
查了下發現多了錯誤的版本在上面 , 可能之前沒睡飽下錯指令所致微軟官方
1 2 3 4 5 6 7 8 9 10 11 12 13 14 15 16 17 18 19 sudo vim /etc/apt/sources.list #deb https://packages.microsoft.com/ubuntu/18.04/prod focal main # deb-src https://packages.microsoft.com/ubuntu/18.04/prod focal main wget https://packages.microsoft.com/config/ubuntu/20.04/packages-microsoft-prod.deb -O packages-microsoft-prod.deb sudo dpkg -i packages-microsoft-prod.deb rm packages-microsoft-prod.deb #sdk sudo apt-get update; \ sudo apt-get install -y apt-transport-https && \ sudo apt-get update && \ sudo apt-get install -y dotnet-sdk-5.0 #run time sudo apt-get update; \ sudo apt-get install -y apt-transport-https && \ sudo apt-get update && \ sudo apt-get install -y aspnetcore-runtime-5.0
主要參考這篇(https://github.com/OmniSharp/Omnisharp-vim )
1 2 3 4 5 vim ~/.vimrc call plug#begin('~/.vim/plugged') #for csharp Plug 'OmniSharp/omnisharp-vim'
接著在 vim 執行以下命令安裝 OmniSharp , 搞定後首次他會問我們要不要安裝 OmniSharp-Roslyn server 選 Yes 即可
接著在 Ubuntu 上面玩看看 .net core , 可以通過 dotnet xxx –help 來看詳細命令 , 這邊就直接蓋個 console 看看
1 2 3 4 5 6 7 8 9 10 mkdir helloworld cd helloworld dotnet new --list #Console Application console [C#],F#,VB Common/Console #Class library classlib [C#],F#,VB Common/Library #Worker Service worker [C#],F# Common/Worker/Web #MSTest Test Project mstest [C#],F#,VB Test/MSTest #NUnit 3 Test Item nunit-test [C#],F#,VB Test/NUnit #......
蓋個 console 看看幫我們建了什麼
1 2 3 dotnet new console ls helloworld.csproj obj Program.cs
試著弄個 helloworld , 體驗一下 , 只能說連維護都不是很好用
1 2 3 4 5 6 7 8 9 10 11 12 13 14 15 16 17 using System; using System.IO; namespace helloworld { class Program { static void Main(string[] args) { Console.WriteLine("HelloWorld"); //StreamWriter file = new StreamWriter("test.txt"); //file.WriteLine("Hello world"); //file.Close(); } } }
最後跑看看是否成功寫入 , 結論就是裝 B 跟拿來看看 code 還可以用 , 實際開發還是用 IDE 比較有效率
老樣子包個 Dockerfile 來玩看看 , 參考官方
1 2 3 4 5 6 7 8 9 10 11 12 13 14 15 16 17 18 19 # https://hub.docker.com/_/microsoft-dotnet FROM mcr.microsoft.com/dotnet/sdk:5.0 AS build WORKDIR /source # copy csproj and restore as distinct layers COPY *.sln . COPY helloworld/*.csproj ./helloworld/ RUN dotnet restore # copy everything else and build app COPY helloworld/. ./helloworld/ WORKDIR /source/helloworld RUN dotnet publish -c release -o /app --no-restore # final stage/image FROM mcr.microsoft.com/dotnet/aspnet:5.0 WORKDIR /app COPY --from=build /app ./ ENTRYPOINT ["dotnet", "helloworld.dll"]
試跑看看 docker , 注意指定的 image 在最後面 , 另外如果用 -d 參數的話 , 這種單純的 console 是沒辦法跑起來的 , 需要切換 entrypoint
1 2 3 4 5 6 7 8 docker run -it hello-console --name hello-console #HelloWorld #切換進入點 , 並且用 attach 進去看看 docker run -d -it --name hello-console --entrypoint sh hello-console docker attach 341 ls #helloworld helloworld.deps.json helloworld.dll helloworld.pdb helloworld.runtimeconfig.json
fzf 安裝 navi 相依於 fzf , 所以先安裝 fzf , 注意最好用新一點的版本 , 不然 navi 會炸這個 error invalid preview window layout: up:2:nohiddenctrl + [ 來代替 or ctrl + q 也可以ctrl + n ctrl +p 以外還可以用 ctrl + j ctrl + k 上下移動
1 2 3 4 5 6 sudo apt update sudo apt upgrade git clone --depth 1 https://github.com/junegunn/fzf.git ~/.fzf ~/.fzf/install source ~/.bashrc
安裝 navi 參考官方
1 2 3 4 5 6 7 cd ~ sudo git clone --depth 1 https://github.com/denisidoro/navi cd navi sudo git fetch --all --tags sudo apt-get install cargo sudo git checkout tags/v2.15.0 sudo make install
都安裝好後可以自己蓋個檔案來玩看看 , 注意副檔名要是 .cheat , 可以把自己常用的一些 script 寫進來方便用% 符號是 大類 # 是小類 , 還滿直覺的
1 2 3 4 5 6 7 8 9 10 11 12 13 14 15 16 17 18 19 20 21 22 23 24 25 26 27 28 29 30 31 32 33 34 35 36 37 38 39 40 41 42 43 44 45 46 47 48 49 50 51 52 53 54 55 56 57 58 59 60 61 62 63 64 65 66 67 68 69 70 71 72 73 74 75 76 77 78 79 80 81 82 83 84 85 86 87 88 89 90 91 92 93 94 95 96 97 98 99 100 101 102 103 104 105 106 107 108 109 110 111 112 113 % docker 掛狗大全 # docker container 幫助 docker container --help # docker 幫助串 grep docker --help | grep --color container # docker 列出 container docker container ls # docker 列出 image docker image ls # docker helloworld docker run hello-world # docker 列出停止的 container docker container ls -a # docker 列出停止的 container docker container ls -a # docker 跑 busybox docker run -it busybox sh # docker 跑 dotnet core docker run -it --rm mcr.microsoft.com/dotnet/sdk dotnet # docker 跑 nginx docker run --name nginx -d -p 8080:80 nginx # docker 查歷史 docker history 22d # docker 查 log docker logs 418 # docker 查 container 詳細訊息 docker inspect 418 # docker 拉 hello-world docker pull hello-world # docker 刪除沒用的 container docker container prune # docker 附加到 container 上 docker attach 7d3 # docker 啟動停止的容器 docker start 723 # docker 跳進容器 (bash) docker exec -it 23d /bin/bash # docker 死亡指令 (注意不要亂用 機器會爆炸) echo "docker run -v /:/data busybox rm -rf /" # docker 拉 imagemagick docker pull dpokidov/imagemagick # docker 轉換圖片為 ico docker run -v ~/imgs:/imgs dpokidov/imagemagick -background transparent /imgs/kuai.png -define icon:auto-resize=16,24,32,48,64,72,96,128,258 /imgs/kuai.ico # docker 建立 volume docker volume create test # docker 執行 imagemagick 在 volume 上 docker run -v test:imgs -d -it --entrypoint-/bin/bash dpokidov/imagemagick # docker 查網路 docker network ls # docker 讓網路跑在 host 上 docker run -d --network=host nginx # docker 網路跑橋接 docker run -d -p 8080:80 --network=bridge nginx # docker 查 container 內的 ip docker inspect 345 | grep -i ipaddress # docker container 網路用其他 container 的網路 docker run -it --net=container:345 nginx # docker 查 pid docker inspect 2f3 | grep -i pid # nsenter 看 docker 網路 sudo nsenter -t 12342 -n # docker 看 netns sudo ls /var/run/docker/netns # docker 打標籤 tag docker tag dotnet-cowsay:latest dotnet-cowsay:latest # docker 打標籤 tag remote docker tag dotnet-cowsay:latest 172.18.22.33/dotnet-cowsay:latest # docker login harbor docker login http://10.1.2.123 --username admin --password Harbor12345 # docker commit docker commit -m "cowsay" -c "ENV PATH=$PATH:/usr/games" 1234asfw dotnet5-new-cowsay # docker 搭配 jq 輸出 raw ls $(docker inspect test | jq -r ".[0].Mountpoint") # docker 持續監控 log docker logs s12 -f -t
接著讀取自己的檔案看看 , 如果按了 enter 會直接把 command 執行在 terminal
1 2 3 4 5 navi --path . navi --path . --print docker 掛狗大全 docker image 用法 docker image ls ⠀ docker 掛狗大全 docker 用法 docker container ls ⠀
tldr ubuntu 20 基本上無腦安裝 , 老實說這個訊息量確實少了很多 , 有好有壞
1 2 3 sudo apt-get install tldr #測看看 docker 用法 tldr docker
安裝 thefuck https://github.com/nvbn/thefuck
1 2 3 4 5 6 7 8 9 10 11 12 13 sudo apt-get install -y pip pip install thefuck vim ~/.bashrc PATH=$PATH:/home/vagrant/.local/bin source ~/.bashrc fuck #Seems like fuck alias isn't configured! #Please put eval "$(thefuck --alias)" in your ~/.bashrc and apply changes with source ~/.bashrc or restart your shell. #Or run fuck a second time to configure it automatically. #More details - https://github.com/nvbn/thefuck#manual-installation source ~/.bashrc
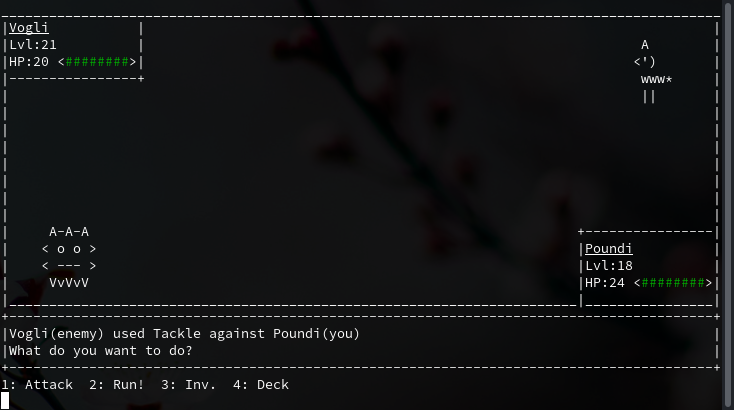
Pokete 人生苦悶 , 尤其值班時要守在電腦前 , 這時候玩點類寶可夢散散心 Pokete 坦白說還不錯玩 XD
其他好玩咚咚 https://github.com/agarrharr/awesome-cli-apps https://github.com/alebcay/awesome-shell https://vim.reversed.top/